A Supporting Blog — Laser Cutting and Marking Machines for Construction
1. Introduction
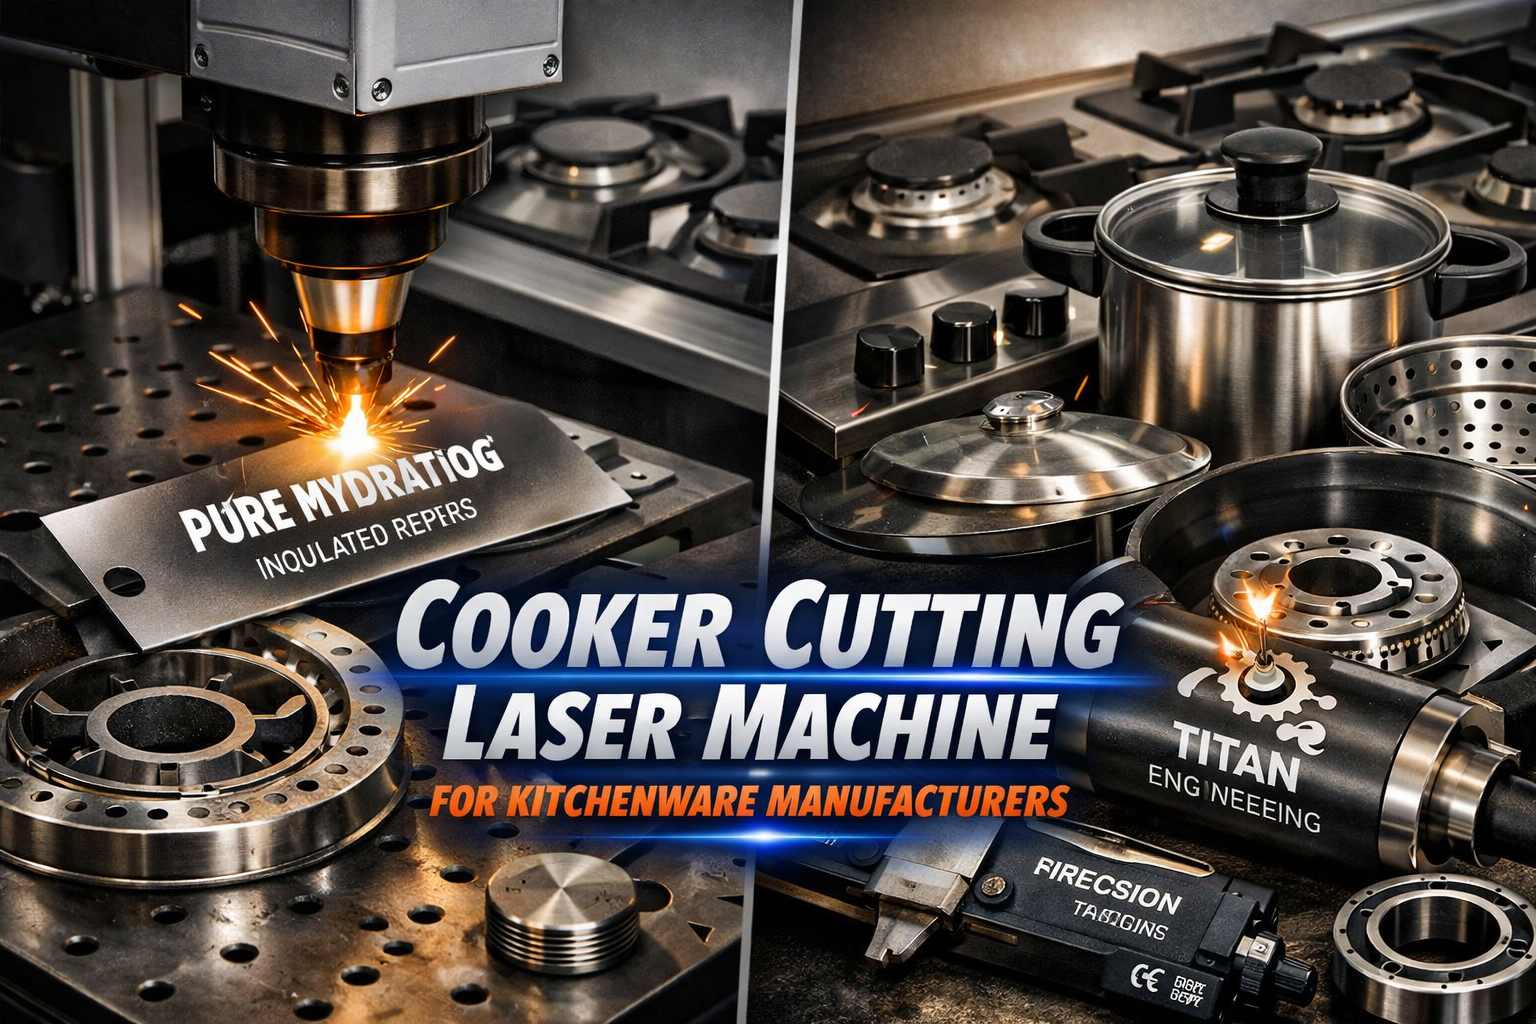
Cooker and kitchen equipment manufacturing has a precision problem that shows up every day on the production floor — and most manufacturers are solving it with tools that were never designed for the job.
Thin stainless steel panels, burner ring cutouts, oven cavity liners, and exhaust hood canopies all require clean, precise cuts with no heat discolouration and no edge that needs polishing before the part is acceptable. Press tools lock you into fixed designs and take weeks to change. Plasma cutting discolours stainless and leaves rough edges. Turret punching creates micro-cracks on stainless cut faces. Manual cutting and grinding add labour cost and inconsistency to every batch.
A fibre laser cutting machine solves all of these problems from a single investment. It cuts thin stainless steel cleanly without discolouration, handles complex burner patterns and panel cutouts that press tools cannot produce economically, and switches between product designs in minutes rather than days. For cooker manufacturers and kitchen equipment OEMs producing in medium-to-high volume, it is the most impactful single upgrade available to the production process.
This guide is written specifically for cooker manufacturers, kitchen appliance OEMs, and stainless steel sheet metal shops supplying the appliance industry. It covers why fibre laser is the right machine type for kitchenware production, what it can cut and how, the specifications that matter for this application, and a step-by-step buying guide tailored to kitchenware manufacturing requirements.
This guide focuses on the machine for kitchenware cutting. For a broader explanation of how laser cutting improves the full range of kitchen equipment manufacturing operations, read How Laser Cutting Helps Cooker and Kitchen Equipment Manufacturing.
2. What Cooker and Kitchen Equipment Manufacturing Actually Demands from a Cutting Machine
Before evaluating any machine, it is worth being precise about what kitchenware manufacturing actually requires from a cutting process — because the requirements are specific enough that the wrong machine type makes significant problems worse rather than solving them.
The Product Range and Its Cutting Requirements
The core products in cooker and kitchen equipment manufacturing span a wide range of panel types and complexity levels:
- Domestic cooker bodies: Top deck, side panels, back panel, oven liner, drawer front — multiple flat panels per unit with precise hole patterns and dimensional tolerances for assembly fit.
- Hob tops and burner assemblies: Complex circular and radial cutouts for burner rings, gas valve positions, and ignition points — tolerances of 0.2mm or less for burner alignment.
- Exhaust hoods: Large stainless panels up to 1500mm x 600mm with fan housing cutouts, filter frame openings, and lighting positions.
- Commercial kitchen equipment: Serving counters, bain marie units, oven panels, rack guides — a wide variety of stainless components produced in smaller batches with more frequent design variation.
Materials and Thicknesses
The dominant materials in kitchenware manufacturing are stainless steel grade 304 (for visible and food-contact surfaces) and grade 430 (for painted and hidden structural components), typically in the range of 0.8mm to 3mm thickness. Mild steel sheet is used for internal structural components and painted outer casings. Aluminium appears in some ventilation and canopy applications. Galvanised steel is used for internal frames and supports.
The Precision Requirements
Burner holes in a hob top must be positioned to within 0.2mm to ensure the burner assembly aligns with the gas supply below. Oven cavity liner panels must be cut to dimensional tolerances that allow the door seal to compress evenly — any dimensional variation creates a seal gap and a quality defect that is expensive to correct after assembly. Panel edges that will be visible in the finished product must be clean and consistent — a rough or discoloured edge on a stainless cooker panel is a visible quality failure.
The Variety and Volume Challenge
Indian cooker manufacturers typically produce multiple product lines — two-burner, three-burner, four-burner cookers in different sizes and configurations — alongside OEM supply to international buyers who require different specifications for different markets. This means the cutting process must handle frequent design changeovers without the tooling cost and lead time that press-based manufacturing requires.
Why Traditional Methods Fail on Stainless Kitchenware
Press tooling: Fixed designs, expensive tooling, weeks of lead time for changes. Every new panel variant requires new tools — commercially unsustainable for manufacturers serving multiple markets.
Plasma cutting: Produces heat discolouration on stainless steel that is unacceptable on visible surfaces. Requires post-cut polishing on every stainless component — a significant labour cost.
Turret punch: Creates micro-cracks at the cut face on stainless steel, reducing corrosion resistance at the edge. Cannot produce smooth curves or complex external profiles without secondary operations.
3. Why Fibre Laser Is the Right Machine for Stainless Steel Kitchenware Cutting
There are two laser cutting technologies available: fibre laser and CO2 laser. For kitchenware manufacturing — where the primary material is stainless steel and the secondary material is aluminium — fibre laser is the correct choice, and has been for several years.
| Factor | Fibre Laser | CO2 Laser |
| Wavelength | 1064nm — absorbed well by metals | 10,600nm — partially reflected by SS/Al |
| Stainless Steel Quality | Excellent — no discolouration | Good — some edge discolouration risk |
| Aluminium Cutting | Excellent | Less efficient — higher reflection |
| Thin Sheet Speed | Very Fast | Fast |
| Energy Efficiency | High — 30–40% wall-plug efficiency | Lower — 10–15% efficiency |
| Maintenance | Low — no mirrors or gas fill | Higher — mirrors, beam alignment |
| Laser Source Life | 100,000+ hours | 20,000–30,000 hours |
| Footprint | Compact | Larger |
| Best For Kitchenware | Yes — current standard | Being replaced by fibre |
How Fibre Laser Wavelength Determines Cut Quality on Stainless
Fibre lasers produce a beam at 1064nm wavelength. At this wavelength, stainless steel and aluminium absorb the beam energy efficiently — the metal heats rapidly and melts cleanly without the reflectivity problems that CO2 lasers experience on polished stainless surfaces. The result is a cut that is clean, consistent, and free of the edge discolouration that occurs when cutting parameters are not matched to the material.
What Fibre Laser Produces on Thin Stainless Steel
On 1mm to 2mm stainless steel — the most common thickness range for cooker panels and kitchen equipment cladding — a correctly configured fibre laser machine cuts with nitrogen assist gas produces an edge that is smooth, silver-bright, and completely free of oxide discolouration. The edge requires no polishing, no cleaning, and no secondary treatment before the part goes to assembly or powder coating.
Energy Efficiency and Running Cost
Fibre lasers are significantly more energy-efficient than CO2 lasers. A 3kW fibre laser typically draws 8kW to 12kW of electrical power in total (including chiller). An equivalent CO2 laser draws 20kW to 30kW for similar output. For a production facility running two shifts, this efficiency difference translates into a meaningful reduction in electricity cost over the machine’s working life.
Watch Out: Do not invest in a CO2 laser machine for stainless steel kitchenware cutting. Fibre laser is now the industry standard for this application, delivers better quality, lower running cost, and longer service life. Any supplier offering CO2 as the preferred option for stainless steel kitchenware should be asked to justify this recommendation.
4. Specific Applications — Cooker Body and Panel Cutting
The domestic cooker body consists of multiple flat panels — each with specific dimensional tolerances, hole patterns, and cutout positions — that must fit together precisely at assembly.
Top Deck and Hob Plate
The hob top plate is the most dimensionally critical component in a domestic cooker. It carries the burner ring holes, gas valve cutouts, ignition mounting points, and pan support locating features — all in precise spatial relationship to each other. The positional tolerance on burner holes is typically 0.2mm or less, because the burner assembly below must align correctly for the gas flow to function safely.
A fibre laser cutting machine produces all of these features from a single cutting program, derived directly from the product drawing. Every hob plate in a production batch is cut to identical specification — no manual marking, no positioning variation between operators.
Outer Body Side and Back Panels
The side panels and back panel of a domestic cooker are typically cut from mild steel sheet (for painted finishes) or stainless steel (for visible stainless finishes). These panels carry fixing holes, cable entry cutouts, and ventilation openings — features that must be positioned consistently across every unit to allow assembly line production. Laser cutting produces these panels to consistent dimensions that allow assembly without adjustment.
Oven Cavity Liner Panels
The inner liner of an oven cavity — typically formed from vitreous enamel-coated mild steel — must be cut to tight dimensional tolerances so that the oven door seal compresses evenly against the cavity opening. Any dimensional error in the cut panel creates a seal gap that allows heat to escape and represents a quality failure. Laser cutting eliminates this source of variation, producing cavity liner panels that are dimensionally consistent across every batch.
Drawer Front Panels and Handle Mounting Plates
Cooker drawer fronts and handle mounting plates are visible components in the finished product and must be cut to precise dimensions with clean edges. On stainless steel drawer fronts, a rough or discoloured edge is a visible quality defect. Laser cutting on stainless with nitrogen assist produces the clean, polished-appearance edge that these visible components require — without secondary polishing.
Eliminating Press Tools for Panel Designs
A conventional cooker manufacturer maintains a library of press tools for every panel in every model — hob tops, side panels, oven liners, drawer fronts. Each tool set costs INR 2L to INR 10L to produce and takes four to eight weeks to deliver. When a model is updated, the old tools are scrapped. Laser cutting eliminates this entire tooling investment. New panel designs go from CAD drawing to cut part in the same shift.
Key Insight: A cooker manufacturer producing 5 product variants with conventional press tooling maintains 50 to 100 individual tool sets across all models. Replacing press tooling with laser cutting for all flat panel components eliminates this tooling inventory entirely — and makes design updates a software operation rather than a capital expenditure.
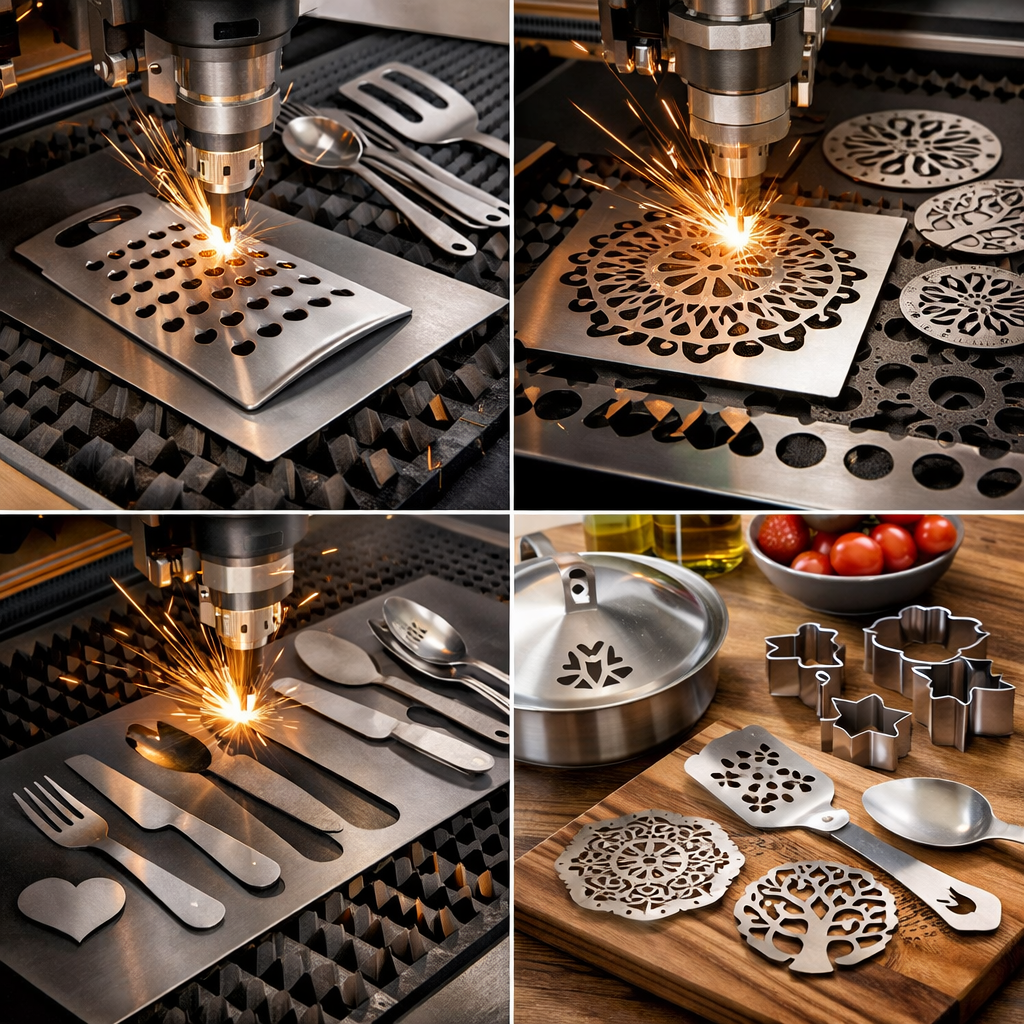
5. Specific Applications — Burner Assembly and Hob Components
Burner assembly components present some of the most complex cutting profiles in cooker manufacturing — circular and radial patterns that are difficult and expensive to produce with press tooling but straightforward for a laser cutting machine.
Burner Ring Cutting
Gas burner rings are circular or annular components with complex radial slot patterns that control gas distribution around the flame. These profiles require precise circular geometry and consistent slot dimensions — small variations in slot width affect flame distribution and combustion efficiency. Press tooling can produce these profiles but requires dedicated tooling for each burner size and configuration.
A laser cutting machine produces burner ring profiles directly from a DXF drawing. Multiple burner ring sizes — two-burner, three-burner, wok burner — are cut from the same machine by loading different programs. Changing from one burner size to another requires no tooling change — only a program change.
Hob Top Grate Supports and Burner Cap Profiles
Grate supports — the cast iron or steel components that pans rest on above the burner — are sometimes stamped from flat plate using dies. Laser cutting offers an alternative for small-batch and prototype production, allowing grate support designs to be produced and iterated without tooling. For manufacturers testing new grate designs or producing small batches of premium products, this is a significant advantage.
Gas Manifold Mounting Brackets and Burner Body Housings
The internal structure of a gas cooker — the manifold brackets, burner body mounting plates, and thermocouple support components — is cut from mild steel sheet in moderate volumes. These components carry precise hole patterns for gas connections and are not visible in the finished product. Laser cutting produces them quickly and accurately, and multiple bracket types can be nested and cut from a single sheet in one run.
Wok Burner Rings and High-BTU Components
Wok burners and high-BTU commercial-grade burner components typically have larger diameters and more complex slot patterns than standard domestic burners. These profiles are particularly challenging and expensive to tool for press production. Laser cutting handles them as straightforwardly as a standard burner ring — the complexity of the profile adds only seconds to the cutting time per piece.
For a broader discussion of how laser cutting improves the full range of cooker and kitchen equipment production, read How Laser Cutting Helps Cooker and Kitchen Equipment Manufacturing.
6. Specific Applications — Exhaust Hoods and Commercial Kitchen Equipment
Commercial kitchen equipment and exhaust ventilation systems present a different set of fabrication requirements from domestic cookers — larger panel sizes, heavier gauge material in some components, and a greater emphasis on custom configurations for different kitchen layouts.
Exhaust Hood Canopy Panels
Commercial extraction hoods are fabricated from stainless steel sheet in large panel sizes — often 1200mm to 2000mm in the longest dimension. Each panel carries precise cutouts for fan motor housings, electrical entry points, filter cassette frames, and lighting modules. The positions of these cutouts vary with the hood model and the kitchen layout — making a fixed-tooling approach impractical for manufacturers supplying custom or semi-custom hoods.
Laser cutting handles these large-format stainless panels precisely and quickly, producing all cutouts in a single operation. The cutting program is derived from the design drawing and can be modified for each kitchen configuration without tooling cost.
Grease Filter Cassette Frames
Grease filter cassettes slide into channels inside the extraction hood. The filter cassette frame must be cut to precise internal dimensions so that the cassette slides in and out smoothly — too tight and it binds, too loose and it rattles and fails to seal. Laser cutting produces these frames accurately and consistently, with internal corners that press tooling often cannot achieve cleanly without secondary operations.
Commercial Oven Panels and Rack Guides
Commercial ovens — deck ovens, combi steamers, convection ovens — require stainless steel panels, door frames, and internal rack guide channels that must be dimensionally accurate for the oven to assemble and function correctly. Laser cutting produces these components to drawing tolerances without the dimensional variation that manual cutting introduces.
Food Service Counter and Catering Equipment Panels
Stainless steel serving counters, bain marie units, and hot holding equipment require flat stainless panels with cutouts for gastronorm containers, induction units, and electrical connections. The variety of configurations in commercial catering equipment makes laser cutting — with its rapid program changeover — the most practical cutting method for manufacturers producing small-to-medium batches of customised equipment.
7. Machine Specifications — What a Cooker Manufacturer Needs
The right laser cutting machine for a cooker or kitchen equipment manufacturer is not the most powerful machine available — it is the machine that is correctly specified for thin stainless steel production in medium-to-high volume.
| Specification | Recommended for Kitchenware | Why It Matters | What to Avoid |
| Laser Type | Fibre laser | Best quality on SS and Al | CO2 for new investment |
| Power | 1.5kW – 3kW | Covers full kitchenware range | Under 1.5kW limits throughput |
| Bed Size | 1500 x 3000mm minimum | Handles largest hood/counter panels | Smaller beds limit panel size |
| Table Type | Exchange table preferred | Minimises sheet loading idle time | Single table limits throughput |
| Cutting Head | Auto-focus | Fast material thickness switching | Fixed focus wastes setup time |
| Nesting Software | Automatic, mixed-part nesting | Maximises expensive SS utilisation | Manual nesting wastes material |
| Assist Gas | Nitrogen system for SS | Clean oxide-free edge on stainless | Oxygen on SS = discolouration |
| Chiller | Water-cooled, sized for duty | Prevents thermal shutdown | Undersized chiller = downtime |
Bed Size — Matching the Largest Panel in Your Product Range
A standard 1500mm x 3000mm bed covers the full range of domestic cooker panels and most commercial kitchen components. For manufacturers cutting large exhaust hood canopy panels (above 1500mm in one dimension) or long counter top panels, a 2000mm x 4000mm format machine may be needed. Before specifying bed size, measure the largest single component in your full product range and ensure the machine bed is larger.
Laser Power — Why 1.5kW to 3kW Is the Right Range
For thin stainless steel in the 0.8mm to 3mm range that dominates kitchenware production, a laser power of 1.5kW to 3kW is the standard specification. This power range cuts thin stainless cleanly and quickly without the excessive heat input that causes quality problems. Higher power (4kW and above) is available and cuts faster, but adds machine cost without proportional benefit for the thin gauge materials in kitchenware production.
Exchange Table — Essential for High-Volume Production
In a high-volume cooker production environment — processing 15 or more sheets per shift — machine idle time during sheet loading and unloading is a measurable productivity loss. An exchange table configuration allows one sheet to be cut while the next is being loaded on the second table, reducing idle time between sheets to near zero. For production volumes above 10 sheets per shift, an exchange table is worth the additional investment.
Auto-Focus Cutting Head
A cooker manufacturer typically cuts multiple material thicknesses in a single production day — 1mm stainless for visible panels, 1.5mm for structural components, 2mm for hob tops. An auto-focus cutting head adjusts the focal length automatically for each material thickness as the program changes, without manual adjustment between runs. For a shop cutting multiple thicknesses, this reduces setup time between batches.
Pro Tip: For a cooker manufacturer cutting stainless steel sheet in the 1mm to 2.5mm range at a volume of 10 to 20 sheets per shift, a 2kW to 3kW fibre laser with an exchange table and automatic nesting software is the correct standard specification. This combination covers all typical kitchenware cutting requirements at production speed.
8. Cutting Stainless Steel — Parameters, Gas, and Edge Quality
Cutting stainless steel cleanly requires not just the right machine but the right parameters — and the most critical parameter decision is the choice of assist gas.
| Assist Gas | Material | Edge Quality | Discolouration | Use For |
| Nitrogen (N₂) | Stainless steel | Excellent — oxide-free | None | All stainless kitchenware |
| Nitrogen (N₂) | Mild steel | Good — clean edge | Minimal | Where clean edge is needed |
| Oxygen (O₂) | Mild steel | Good — fast cut | Slight oxide | Internal/painted components |
| Oxygen (O₂) | Stainless steel | Poor — heavy discolouration | Severe | Never use on visible SS |
| Compressed Air | Mild steel | Acceptable | Some | Budget option — mild steel only |
| Argon (Ar) | Aluminium | Excellent | None | Aluminium components |
Why Nitrogen Is the Only Correct Choice for Visible Stainless Components
Nitrogen assist gas produces a chemically inert cutting atmosphere at the cut zone — it prevents the molten metal from oxidising as it is expelled from the kerf. The result is a cut edge that is silver-bright, oxide-free, and clean enough to go directly to the powder coating or assembly stage without any secondary treatment. This is the standard that kitchenware production requires.
What Happens When Oxygen Is Used on Stainless
Oxygen assist gas reacts with the chromium in stainless steel at the cut zone, producing chromium oxide — the brown-gold-blue discolouration that is visible on the cut edge and the adjacent surface. This discolouration cannot be removed by simple cleaning — it requires mechanical polishing or chemical treatment. For visible cooker panels, this discolouration is a quality failure that adds significant labour cost to correct.
Watch Out: Never use oxygen as the assist gas for cutting stainless steel kitchenware components. Even a brief period of oxygen cutting on a stainless sheet will discolour the cut edges of every panel cut in that session. Nitrogen must be the assist gas for all stainless steel cutting in a kitchenware production environment.
Cutting Speed and Focal Position
On thin stainless steel, cutting speed and focal position are the two parameters that most affect edge quality. Too slow a cutting speed produces excess heat at the cut zone and increases the risk of edge discolouration. Incorrect focal position produces a tapered kerf or rough edge. These parameters are set during machine commissioning and should be validated on your specific material grade and thickness before production begins — ask the supplier to demonstrate and document the correct parameters for your materials.
How to Evaluate Stainless Cut Quality at a Supplier Demonstration
- Bring samples of your stainless steel at your standard thicknesses — 1mm, 1.5mm, and 2mm if these are your typical range
- Ask the supplier to cut a sample panel with a hole pattern representative of your hob top or burner assembly
- Examine the cut edge under good lighting: it should be silver-bright with no discolouration and no visible burr
- Check the cut panel dimensions against the program dimensions — positional accuracy should be within 0.1mm
- Ask what nitrogen pressure and flow rate was used, and whether these parameters are documented for your reference
9. Nesting and Material Utilisation — Why It Matters More for Kitchenware Than Most Industries
Stainless steel is significantly more expensive than mild steel — typically three to five times the material cost per kilogram. For a kitchenware manufacturer cutting large volumes of stainless sheet, material utilisation is one of the most important economic factors in the production process.
The Cost of Poor Nesting
A kitchenware manufacturer cutting 20 sheets of 1500mm x 3000mm stainless steel (grade 304, 1.5mm) per shift — at a material cost of approximately INR 15,000 per sheet — has a daily material spend of INR 3,00,000. The difference between 70% material utilisation and 85% material utilisation is a 15% material cost reduction — INR 45,000 per day in material saving. Across a month’s production, this is INR 9,00,000 in material cost that good nesting software recovers.
How Nesting Software Works for Kitchenware Production
Nesting software automatically arranges the panel outlines to be cut across the available sheet area, rotating and repositioning parts to minimise the scrap between them. For a cooker manufacturer cutting multiple panel types of different sizes from the same sheet — hob tops, side panels, and bracket components in a single run — the software optimises the arrangement across all part types simultaneously. This mixed-part nesting approach delivers better utilisation than cutting each panel type on separate sheets.
What to Look for in Nesting Software for Kitchenware
- Automatic nesting with no manual arrangement required — the software should produce an efficient layout without operator input
- Mixed-part nesting — the ability to combine multiple panel types on a single sheet
- Remnant management — the ability to track and reuse sheet remnants for smaller panels
- Material utilisation reporting — the software should report the utilisation percentage for each nested sheet
- Integration with your production planning system — automatic nesting from a job list rather than manual part-by-part programming
Pro Tip: Before finalising a machine purchase, ask the supplier to run their nesting software on a batch of your actual panel designs — not a demonstration set. Compare the material utilisation percentage they achieve against your current nesting. If the improvement is significant, factor this material saving into your ROI calculation.
10. From Tooling-Based to Tooling-Free Production — The Design Flexibility Advantage
The commercial case for laser cutting in kitchenware manufacturing is not only about cut quality and production speed — it is about the design flexibility that tooling-free production enables.
How Press Tooling Locks a Manufacturer into Fixed Designs
Every panel in a press-tool-based cooker manufacturing process requires a dedicated die set. Producing that die set takes four to eight weeks and costs INR 2L to INR 10L depending on complexity. Modifying an existing design — changing a burner hole position, adjusting a panel dimension, adding a new cutout for a different gas valve — requires new tooling with the same lead time and cost. The result is that design changes are expensive, slow, and infrequent.
This rigidity has real commercial consequences. When a buyer requests a product modification — a different burner configuration for an export market, a panel dimension change for a retailer’s private label requirement — a tooling-dependent manufacturer must either decline the modification or absorb the tooling cost. A laser-cutting manufacturer implements the change overnight.
How Laser Cutting Switches Between Designs
In a laser cutting workflow, a cooker panel design is a file — a DXF drawing that defines the cut geometry. Changing from one panel design to another is a file load operation that takes seconds. Producing a new panel variant that has never been cut before is a drawing and programming operation that takes hours, not weeks, and costs nothing in tooling. The first part is cut the same day the drawing is completed.
Prototype and Pre-Production Flexibility
Developing a new cooker model conventionally requires tooling investment before a single prototype panel can be produced. This makes prototype iterations expensive and slow. With laser cutting, prototype panels are cut from the same machine as production panels, using the same materials, at the same quality — the only difference is the program file. This allows manufacturers to iterate designs rapidly and inexpensively before committing to any tooling.
OEM Supply and Export Market Flexibility
Indian cooker manufacturers supplying OEM buyers or export markets frequently need to produce the same basic product in different configurations — different panel dimensions, different control cutout positions, different burner layouts, different market-specific certification markings. Each configuration is a different laser cutting program. The same machine produces all variants without any additional capital investment.
Key Insight: A cooker manufacturer with laser cutting capability can respond to a new OEM buyer’s specification in days rather than months. This speed-to-market advantage is increasingly important in the Indian kitchen appliance market, where private label and export OEM supply are growing segments.
11. Laser Marking for Kitchenware — Branding and Compliance on the Same Machine
Laser cutting and laser marking are complementary technologies that address different stages of the kitchenware production process — and for manufacturers who need both, a laser marking capability can be added to the production line with a relatively modest additional investment.
What Kitchenware Products Need to Be Marked
Finished cookers and kitchen appliances carry several types of permanent marking that are required for commercial sale: brand name and logo on visible panels, model and serial number for after-sales service tracking, BIS certification mark (mandatory for gas appliances sold in India), energy rating label, and electrical specification data for built-in appliances. On metal surfaces, these marks must be permanent and resistant to heat and cleaning chemicals.
How Laser Marking Replaces Labels and Screen Printing on Metal
Traditional marking methods for cooker panels include adhesive labels, screen-printed badges, and mechanically engraved nameplates. Adhesive labels peel and discolour with repeated heating and cleaning. Screen printing requires setup for each design variant. A laser marking machine applies all of these marks directly to the metal surface — permanently, quickly, and with variable data (different serial numbers, different batch codes, different market-specific certification marks) applied in each batch without stopping the machine.
Laser Annealing on Stainless Steel — No Discolouration, No Surface Damage
The challenge with marking stainless steel on food-contact or visible surfaces is that conventional engraving creates a recessed mark with rough edges that can trap residue — unacceptable on food-contact surfaces and visually unattractive on premium appliances. Laser annealing marks stainless steel by producing a colour change through controlled surface oxidation, without removing material. The mark is smooth, flush with the surface, corrosion-resistant, and food-safe.
For a full guide to laser marking for traceability, certification, and branding in manufacturing, read Laser Marking for Construction Parts: Why Traceability Matters. For industrial product and bottle branding applications, read Bottle Laser Marking and Industrial Product Branding: What Buyers Should Know.
12. Buying Guide — How to Choose the Right Laser Cutting Machine for Cooker Manufacturing
Use this six-step process before approaching any supplier. Completing it ensures every supplier conversation is based on your actual production requirements, not on what the supplier wants to demonstrate.
Step 1 — Define Your Sheet Size Range
Identify the largest single panel in your product range — exhaust hood canopy, counter top, or large oven liner. The machine bed must be larger than this panel. Standard 1500mm x 3000mm covers most cooker and domestic kitchen equipment panels. If any panel in your range exceeds 1500mm in width, specify a wider bed.
Step 2 — Confirm Your Material Mix and Thicknesses
List every material grade and thickness you cut: stainless 304 at 1mm, 1.5mm, 2mm; mild steel at 1.5mm, 2mm; galvanised at 1mm, and so on. The machine must handle your full range at production speed with acceptable edge quality. Do not accept a demonstration only on the thinnest material — test the thickest material in your range.
Step 3 — Establish Your Production Volume
How many sheets per shift do you need to process? At 10 sheets per shift or below, a single-table machine is adequate. Above 10 sheets per shift, an exchange table becomes economically justified. At 20 sheets per shift or above, an exchange table is essential for the throughput target to be met.
Step 4 — Evaluate Nesting Software Quality
Ask every supplier to demonstrate their nesting software on a batch of your actual panel designs. Request the material utilisation report after nesting. Compare the utilisation percentage across suppliers — a 5% difference in utilisation on stainless steel represents a significant material cost difference across a year’s production.
Step 5 — Assess After-Sales Support
For a production-critical machine, service response time and spare parts availability in India are as important as machine specification. Ask each supplier: where is their nearest service engineer, what is the committed response time for a machine-down fault, and where are consumables (protective lenses, nozzles) stocked in India?
Step 6 — Request a Stainless Cut Quality Demonstration
Before finalising any purchase, ask the supplier to cut a sample of your stainless steel at your standard thicknesses, using nitrogen assist gas, with a hole pattern representative of your burner assembly or hob top. The resulting edge should be silver-bright, oxide-free, and dimensionally accurate. If the demonstration uses oxygen gas or shows any discolouration on the cut edge, do not proceed with that supplier.
For broader guidance on machine selection across construction and manufacturing applications, read Best Laser Cutting Machine for Construction Fabrication.
13. Conclusion
For cooker and kitchen equipment manufacturers producing stainless steel panels in medium-to-high volume, a fibre laser cutting machine at 1.5kW to 3kW is the production investment that eliminates the three largest constraints in kitchenware manufacturing: press tooling rigidity, post-cut polishing labour, and design inflexibility.
The machine cuts thin stainless steel cleanly, without discolouration, at a quality that goes directly to assembly without secondary treatment. It switches between product designs in minutes. It produces burner ring profiles and panel cutout patterns that press tooling cannot economically deliver for multiple product variants. And it generates the material utilisation discipline — through good nesting software — that reduces the most expensive single input cost in stainless steel kitchenware production.
The commercial case is equally strong. Tooling cost elimination, finishing labour reduction, and design flexibility that enables faster OEM supply and export market response together deliver a payback that for most kitchenware manufacturers in medium-to-high volume production is measured in months rather than years.
The question is not whether a fibre laser cutting machine is the right investment for a stainless steel kitchenware manufacturer — for any shop producing more than 8 to 10 sheets per shift, it clearly is. The question is which machine, from which supplier, with what support, at what specification.
Related Posts

Laser Marking Machine for Rotary and Name Plates in Construction Fabrication
A Supporting Blog — Laser Cutting and Marking Machines for…
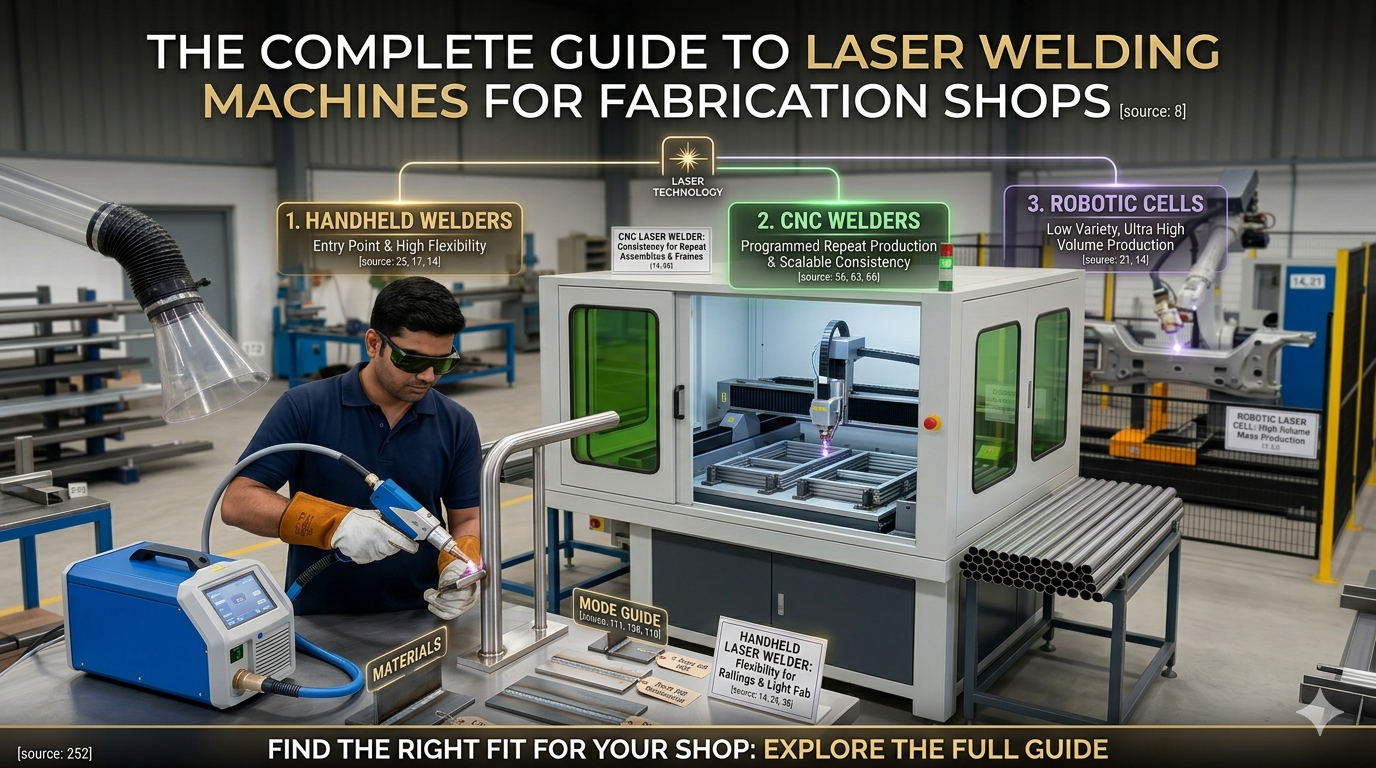
Laser Welding Machine for Metal Fabrication Shops
A Supporting Blog- Laser Cutting and Marking Machines for Construction…
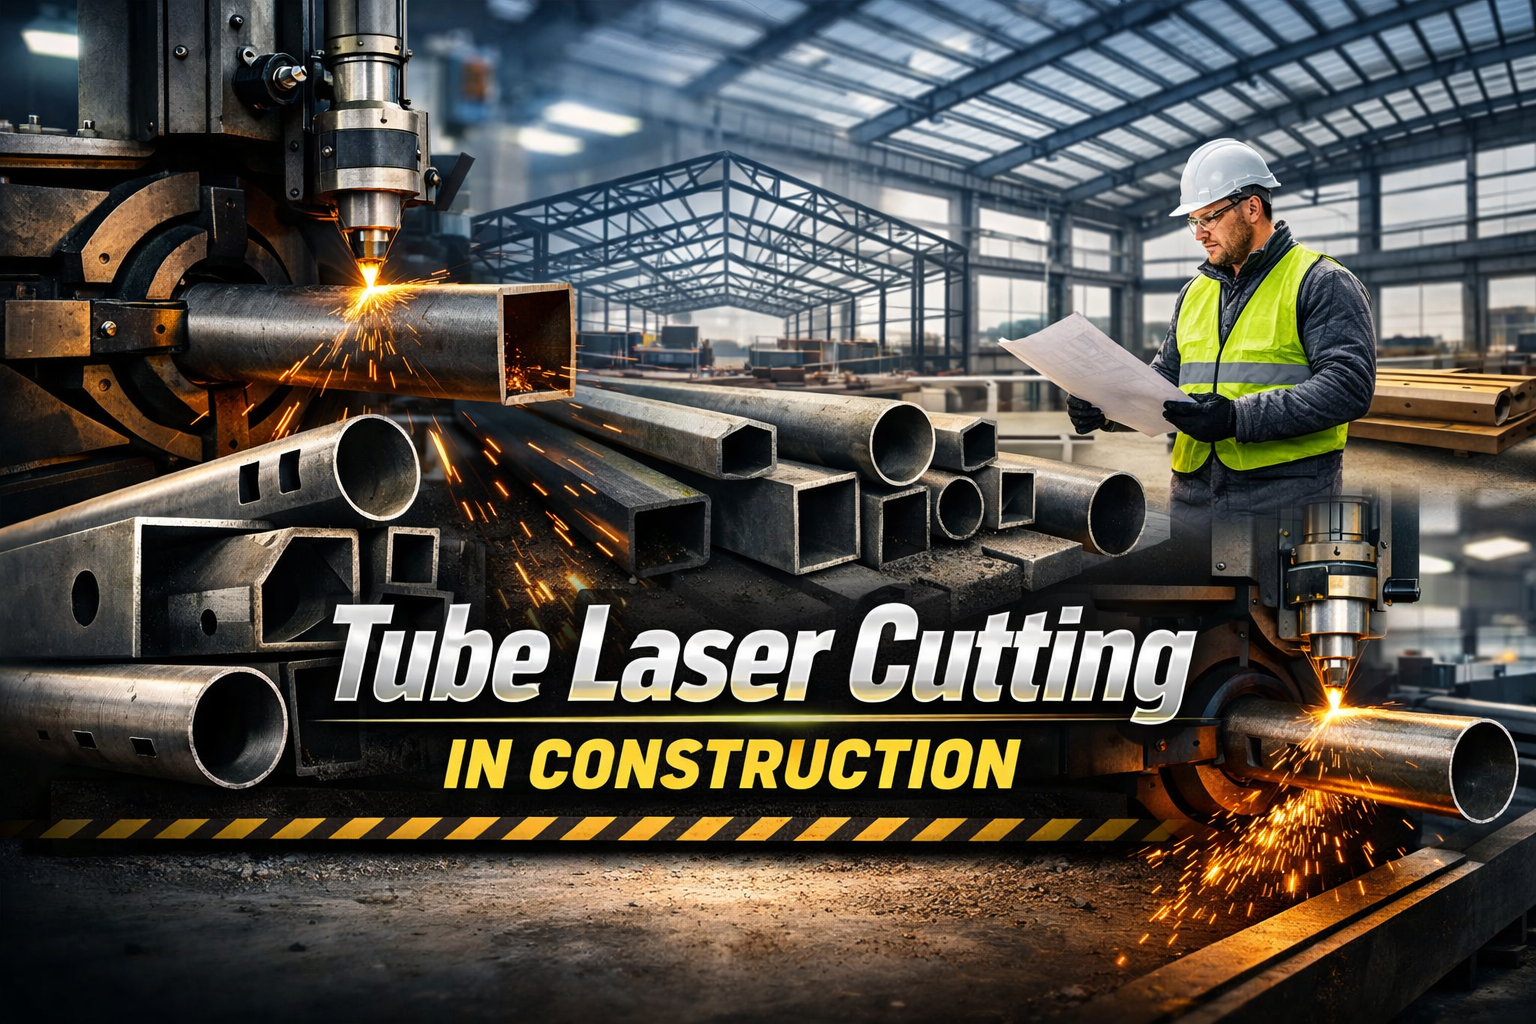
Tube Laser Cutting Machine for PEB and Construction Fabricators
A Supporting Blog — Laser Cutting and Marking Machines for…